
 |  |
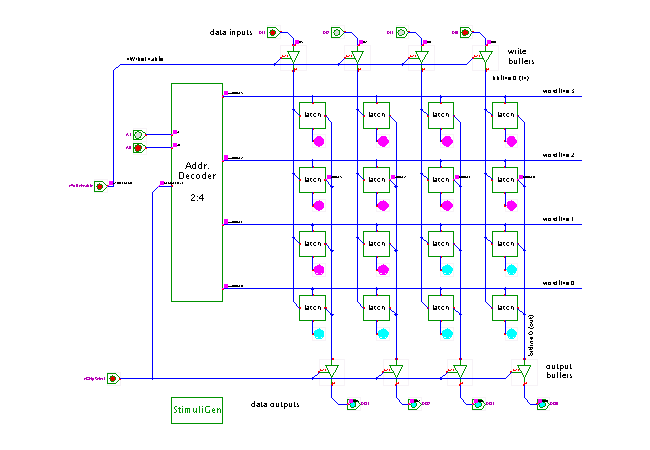
 DescriptionThis applet demonstrates
the standard write-cycle
used to write the RAM memory contents.
The next applet shows the corresponding
read-operation.
When the applet is first loaded by your browser, the animation sequence starts automatically. It stops (pauses) the simulator once the animation is finished. Press the play button in the simulator control panel to continue with an interactive simulation (click the switches), or click the stop (rewind) and play buttons to re-start the animation sequence from the beginning.
The animation sequence also opens the waveform viewer. Depending on your operating system and window manager, you might have to move the waveform viewer window to the background in order to see the animation. After the animation has stopped, press the zoom fit button (or type the f bindkey) in the waveform viewer window to look at the timing of the write-cycles.
The write-cycle sequence starts after a few seconds. It first initializes the data-inputs to the value 0001b and the address input to 00b, and activates the nChipSelect input (active low). Next, the nWriteEnable input is activated (low) for one second. During this interval, the bit-line tri-state buffers drive the bitline with the current input value, which in turn overwrites the previous memory contents of the selected memory cell. Note that the memory contents are instantly propagated to the RAM data outputs via the output bitlines. Next, the nWriteEnable input is deactivated, which finished the first write operation.
The animation sequence then continues to write the data values 0010b, 0111b, and 1000b to addresses 01b, 10b, and 11b. Again, the data-inputs and address-inputs are initialized to the respective values, and nWriteEnable is then asserted for one cycle to write the selected memory cell.
Run the applet | Run the editor (via Webstart)